Exercise: Explore Container Catalog
This is an open-ended exercise intended to guide you through picking a container from the NVIDIA NGC Catalog or Docker Hub, running it on Vista, and performing various small tasks. Each step contains a task, followed by example commands to run. We encourage you to first attempt to complete the task on your own before looking at the example commands, which are just one possible way to accomplish it.
Step 1: Explore NGC Catalog or Docker Hub
The NVIDIA NGC Catalog is a collection of containers, AI models, and other resources maintained by NVIDIA. Similarly, Docker Hub is Docker's official registry, where images can be uploaded by organizations or individual users. Open either link and select a container of your choice. Note that the NGC Catalog contains non-container items such as models and resources, so be sure to filter for containers only. Read the "Overview" tab of the container that you have picked.
Step 2: Check Its Architecture
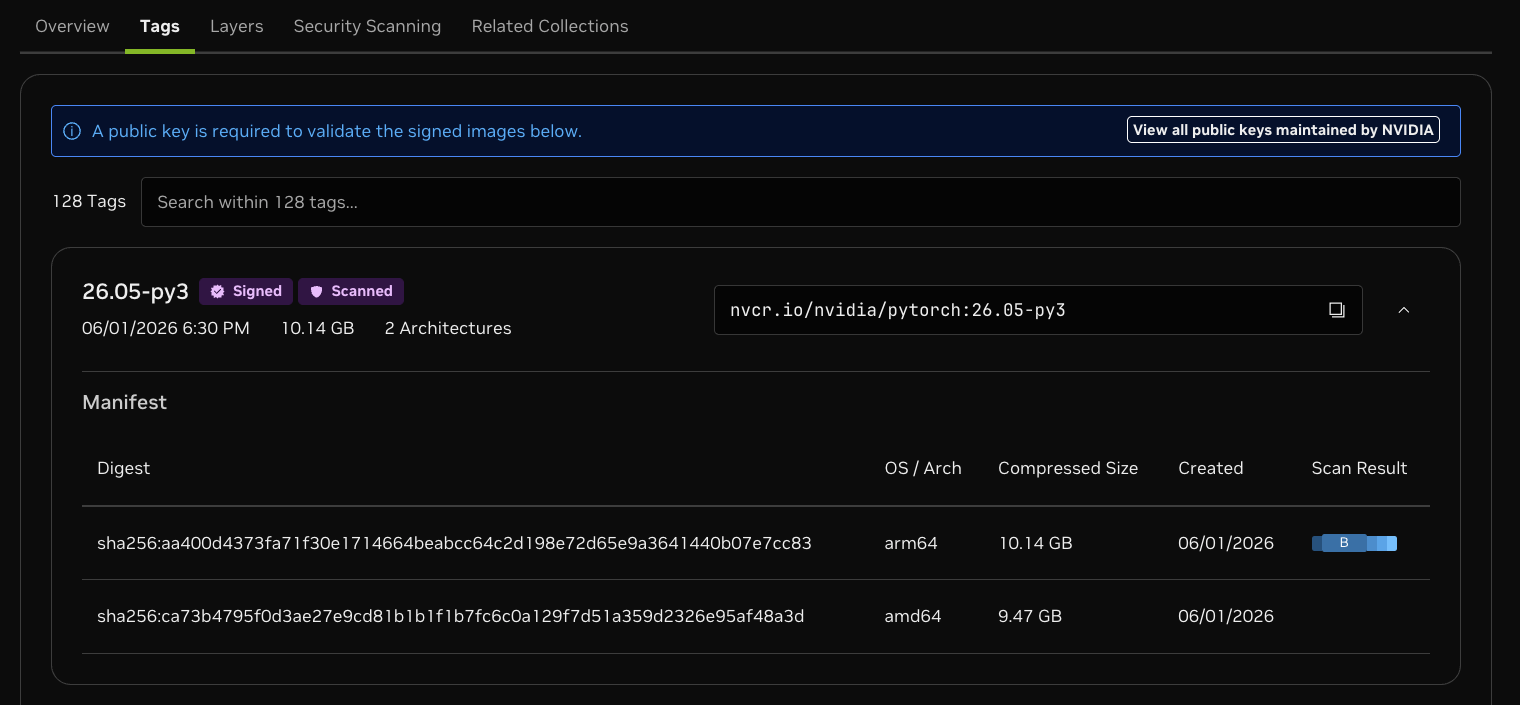
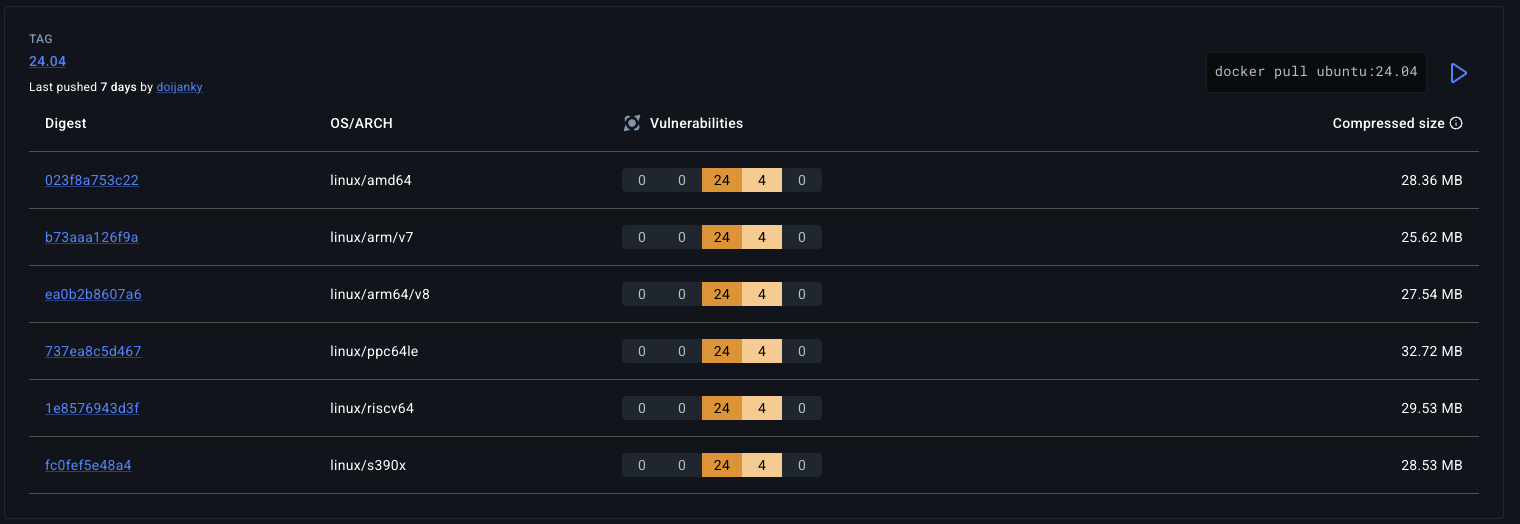
After picking a container image, look for a navigation tab called "Tags" and click on it. Whether you're on the NGC Catalog or Docker Hub, you should see a list of tags for the image. Tags are the different versions of the container. You can check whether a build for a specific architecture exists by expanding a tag on the NGC Catalog, or by clicking "+ more" on Docker Hub. If you see arm64, arm64/v8, or arm64/v9, then the image can be run on Vista. Below are some example screenshots from the NGC Catalog and Docker Hub.
Step 3: Pull and Explore on Vista
Now that you've picked a container image, test it on Vista. Be sure to enter an interactive session using idev and navigate to $SCRATCH before pulling the container, since your image could be large. Then pull the container, open a shell in it, and explore various directories.
Here is a set of commands to help you complete this step. In this example, we pull the NVIDIA Ubuntu container as nvidia_ubuntu.sif.
Open a shell in the container:
Check various directories, such as home, work, and scratch.
Step 4: Contain the Environment
At this point, you should have confirmed that by default, $HOME, $WORK and $SCRATCH exist inside the container when no flag is specified to do otherwise. Now, run the container with the flag that limits access to these directories, then try to write some files inside the container. Do the files exist after you exit the container?
Here is a set of commands to help you complete this step. Use the -C flag to remove all bound directories.
Now, $WORK and $SCRATCH are no longer set, and $HOME points to an empty directory, since -C also clears the environment.
Create a sample file in home:
The file no longer exists after you exit and re-enter the container, since -C gives each session a fresh, empty home directory that is discarded on exit.
Step 5: Bind Directories
Suppose in a particular workflow, you want to bind $SCRATCH and $WORK to the container but not the $HOME directory. Implement this workflow and confirm that you can write files to scratch and work from the container.
Here is a set of commands to help you complete this step. On top of the previous command, add --bind $SCRATCH,$WORK to bind scratch and work, and re-add the environment variables with --env SCRATCH=$SCRATCH,WORK=$WORK so they resolve inside the container.
Your scratch and work should be readable and writable inside the container.
Files written are also present after exiting.
CVW material development is supported by NSF OAC awards 1854828, 2321040, 2323116 (UT Austin) and 2005506 (Indiana University)