OSPRay
By default, ParaView uses an OpenGL renderer to produce the images shown in its RenderViews. While these renderings are sufficient for most purposes, it is sometimes desirable to render images using more advanced lighting and shading techniques. To provide such functionality, the OSPRay ray tracing engine has been integrated into ParaView. The ray tracing technique it uses can provide smoother surfaces, shadows, transparency, specular highlights and anti-aliasing when generating the images that ParaView displays. OSPRay is provided as a separate module on the Frontera supercomputing system at TACC.
Procedural Surfaces
One way in which OSPRay can improve images is by using procedurally defined surfaces when rendering lines and points. To explore this functionality, perform these steps to create some suitable data:
- Edit→Reset Session
- Sources→Data Objects→Wavelet, then click "Apply"
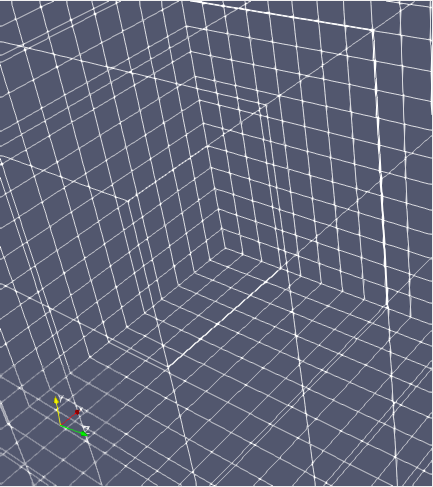
- In Display Properties, set Representation to "Wireframe"
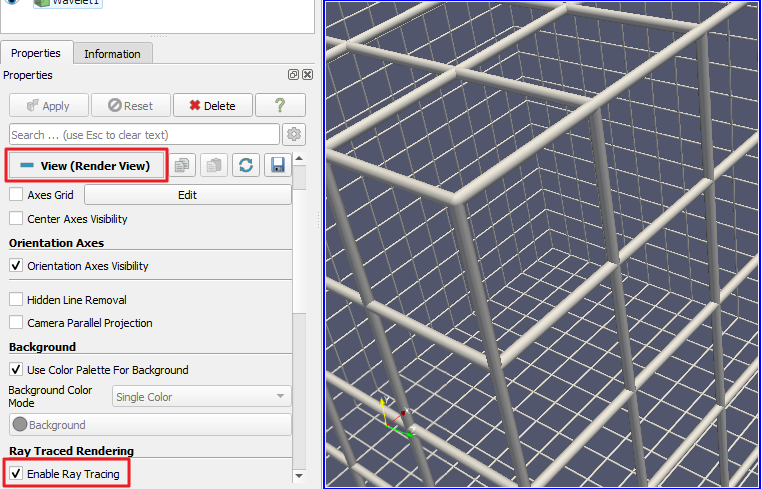
Zoom in to the wireframe grid and notice how the "wires" never change their thickness. Now scroll to the View Properties and check the "Enable Ray Tracing" box. The wires are now replaced with cylinders that have a fixed diameter in model space. Notice that they are drawn larger when they are nearer to the camera.
Transparency and Specular Highlights
Lets switch from displaying lines (cylinders) to points (spheres):
- In Display Properties, change the Representation to "Points".
- Under "Styling", set the Point Size to 10.
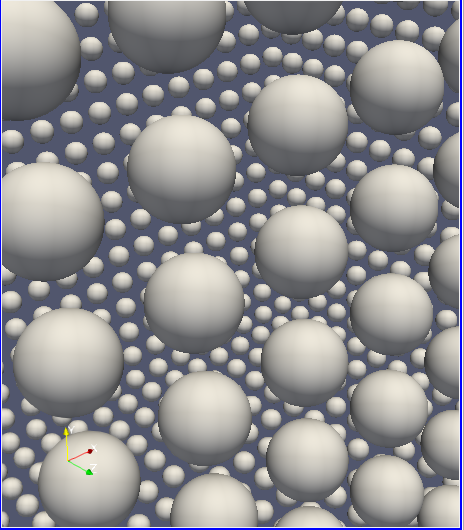
Initially, the OpenGL renderer draws a flat-shaded square of uniform size for each point. If you check "Render Points as Spheres", it shows uniformly sized polygonal approximations of spheres. If you scroll to the bottom of the View section and check "Enable Ray Tracing", OSPRay now renders procedural spheres whose size changes with their distance from the viewer. Notice that these spheres do not exhibit rough edges because they are not approximated with sets of polygons.
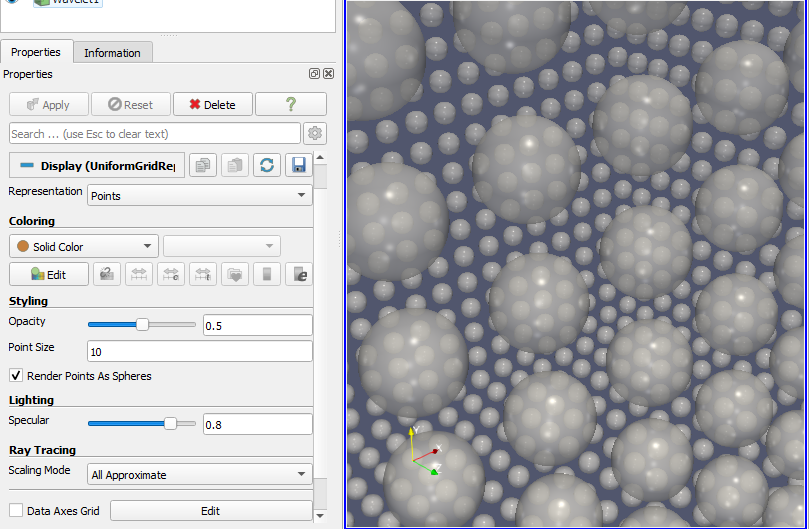
You will see many ray tracing options in the View section, but two of the most powerful features are included in the Display section. After zooming in so there are some larger spheres in the foreground:
- Set the Styling - Opacity value to 0.5 so that the spheres are rendered as partially transparent.
- Set the Lighting - Specular value to 0.8 to see specular highlights from the lights.
Rotate the camera to see how quickly OSPRay is able to produce images with these high quality effects.
Other Options
There are a couple of other "Ray Traced Rendering" options that may be useful to you:
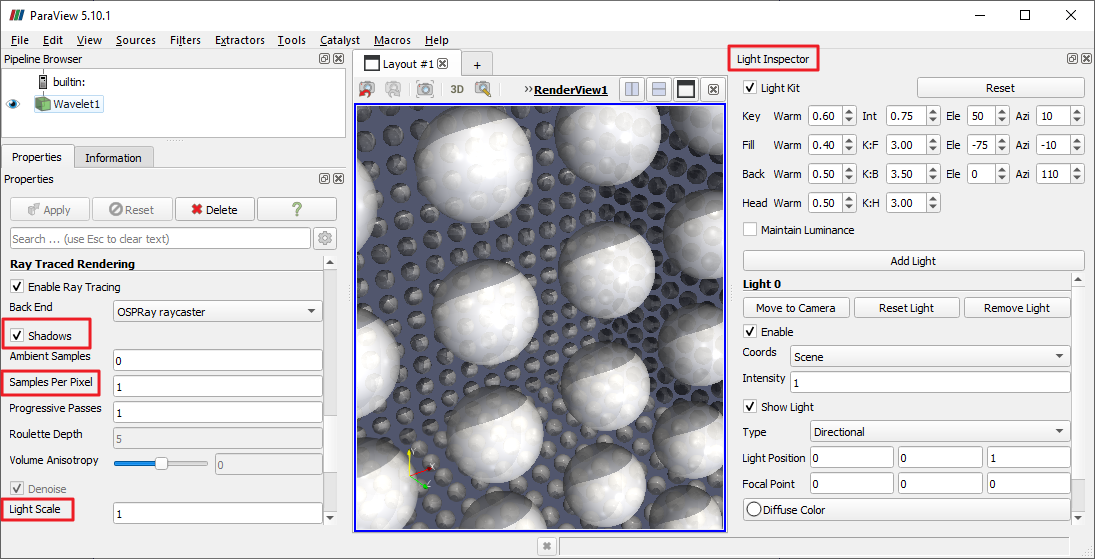
- Check the "Shadows" box to have simple shadows calculated from the light source(es) in your scene. Note that in this example you will see "hard" shadows that have crisp boundaries. It is possible to control the lights in the scene such that softer shadows can be produced. Use View→Light Inspector to show a panel that lets you add lights to the scene and edit their positions, intensities and other properties.
- Try increasing the "Samples Per Pixel" value from "1" to "9" or more to activate anti-aliasing, which will smooth away the "jaggies" you see along the edges of objects and shadows. Note that this will only produce a subtle improvement at the pixel level along high contrast edges and will not improve the smoothness of polygonal shapes or the shadows they cast.
- If the OSPRay image is too light or dark, modify the "Light Scale" value to be lower or higher to adjust the brightness.
Caveats
Some OSPRay functionality does not work the same for all data types, and activating some features can be computationally expensive.
- The Display Properties settings for "Opacity" and "Specular" do not affect polygonal geometry.
- Using a value other than "0" for "Ambient Samples" can greatly increase the rendering time and often produces speckling in the image.
CVW material development is supported by NSF OAC awards 1854828, 2321040, 2323116 (UT Austin) and 2005506 (Indiana University)