Creating an Instance
Creating an Instance
Once you have prepared the security and network entities
that your instance will need, you can create the instance through Horizon.
To do so, go to Project→Compute→Instances in the Horizon interface,
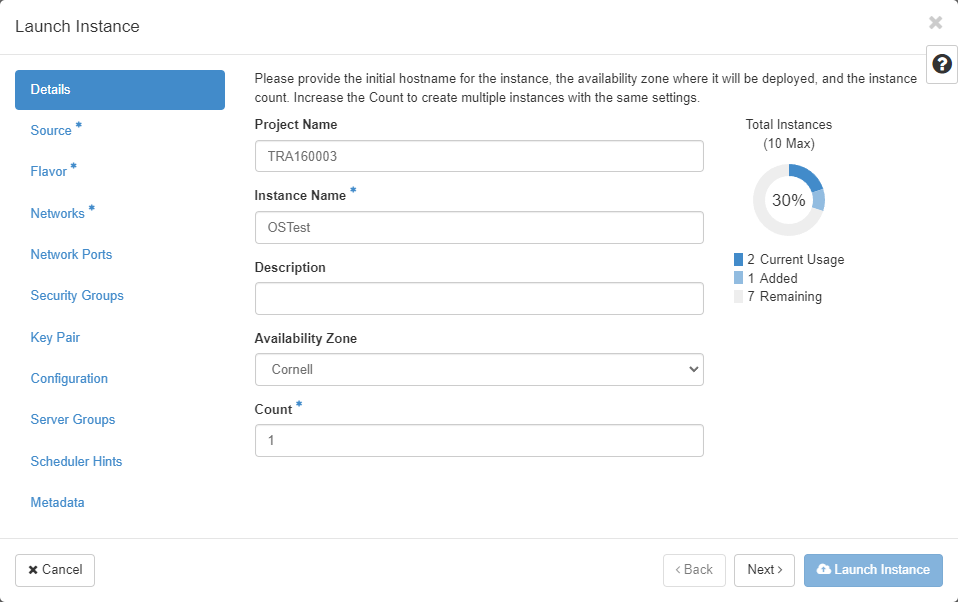
then click Launch Instance.
The dialog that appears displays a list of steps down the left side.
If you are comfortable with the process, you can move directly to the steps you need.
If the process is new to you, you can click Next at the bottom
to move through all of the steps in order.
The steps with asterisks are required and the others allow you to set optional values.
The Horizon documentation contains a complete, if succinct, description of how to launch an instance, including details about every item in every step. The outline below discusses only those steps and items that are necessary to create an instance from a Jetstream2 image.
- Details
-
- Instance Name is required and should be unique in your project.
- Source
-
- Select Boot Source should be set to "Image" to use a standard image. Note that this option will not appear in the dropdown until the image catalog has been loaded. Because there may be a large number of images in a Jetstream2 region, this can take a minute or two.
- Select an Image by clicking on its up arrow icon. To filter the list of images, begin by clicking in the filter text box.
- By default, your instance will be created with a rather small "ephemeral-storage-based" root volume. You can also choose to use a "volume-based" root volume that allows you specify a desired size. You can ready about the pros and cons of doing so before deciding what to do here. To enable a volume-based root volume, toggle Create New Volume to "Yes", which displays additional UI elements. Volume Size (GB) can be increased from the minimum required for the image. Do this to allow space for installing additional software and storing your data. Changing a volume's size after creation is not simple, so be sure to allocate enough space.
- Flavor
-
- Select an Available flavor by clicking its up arrow icon. Select the smallest flavor with sufficient RAM for your needs when creating and developing your instance. Once you are ready to compute, resize the instance to a flavor with the number of CPUs you need.
- Networks
-
- Add the private network you created from the Available list by clicking its up arrow icon. You may add more than one network.
- Security Groups
-
- Add Available security groups by clicking their up arrow icons. You may add more than one security group to your instance, and can change your instance's security groups later. The "default" security group is included by default, but can be removed.
- Key Pair
-
- Key pairs belong to individual users. If you don't have a key pair, click Create Key Pair or Import Key Pair to add one now.
- Select an Available key pair for the instance. Only one key pair can be selected and it cannot be changed later. Make sure you save the private key from the key pair on the computer from which you will be accessing the instance.
Associating a Floating IP Address
When you "launch" an instance, it is both created and then put into the "Running" power state. When the launching process completes, your instance appears in the project's list of instances. The "IP Address" column will show the internal address of the instance, but you cannot use that to log in to the instance.
You must associate the floating IP address that you allocated earlier with your instance using the "Associate Floating IP" option in the menu on the right of the instance's list entry. Once the association has been performed, the public IP address will also be displayed. You can use this address to access the instance.
CVW material development is supported by NSF OAC awards 1854828, 2321040, 2323116 (UT Austin) and 2005506 (Indiana University)