Initial Launch
After starting the process to create an instance,
you will be taken to the main dashboard view where you can monitor the creation progress.
The new instance should be at the top of the list shown in the Instances
summary.
Initially, the status of the new instance will be Building
.
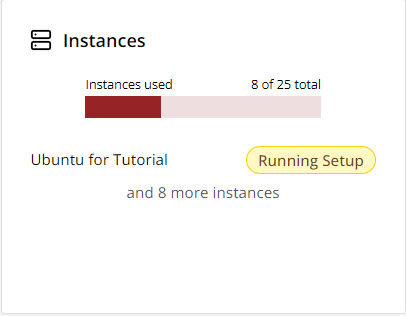
When the instance has been created and is being configured, the status will change to Running Setup
.
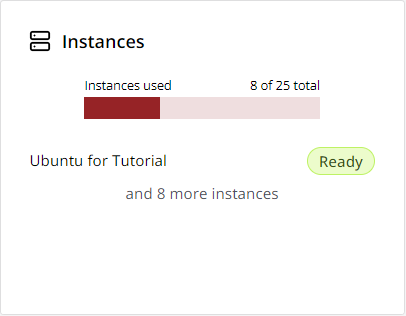
When that is complete the status will change to Ready
(shown in green),
which means that the instance is running and you are able to log in to it.

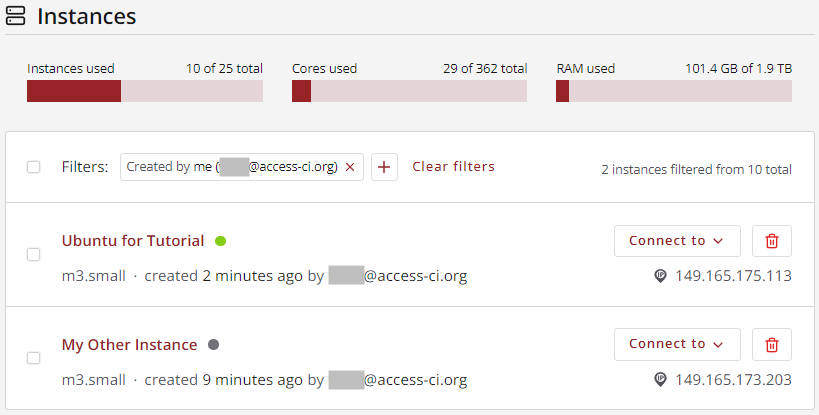
If you click on the Instances summary you will be taken to the Instances dashboard view, where a few details about the instance are displayed. These include its status, its flavor and its IP address. There are also controls that let you connect to the instance via a web browser and delete the instance.
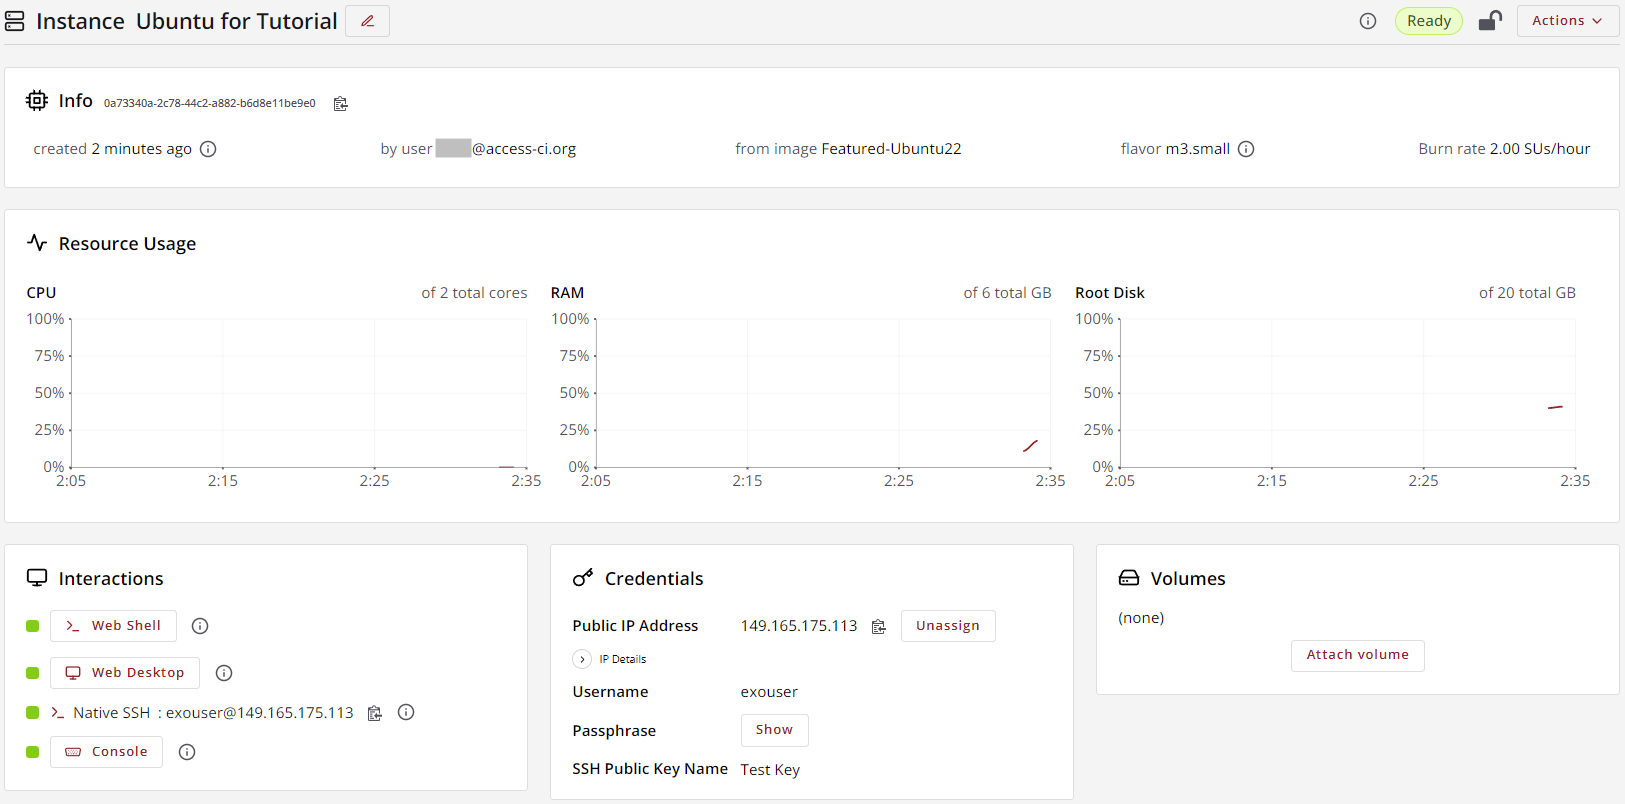
Clicking on an instance in the list will take you to a view of all available details for that instance. This view includes all of the information and functionality from the Instances summary, plus additional details and actions to manage the instance and manage its volumes.
Video Instructions: Initial Launch
CVW material development is supported by NSF OAC awards 1854828, 2321040, 2323116 (UT Austin) and 2005506 (Indiana University)