Render Views
The Render Views panel on the right allows the user to interactively explore a rendered
visualization.
A view's camera can be manipulated by dragging the mouse in the window and rolling the mouse wheel.
Using different mouse buttons in combination with the Control and Shift keys
will produce different types of camera movements.
You can view or edit the camera movement controls in the Camera tab of the Settings dialog,
which can be shown from the
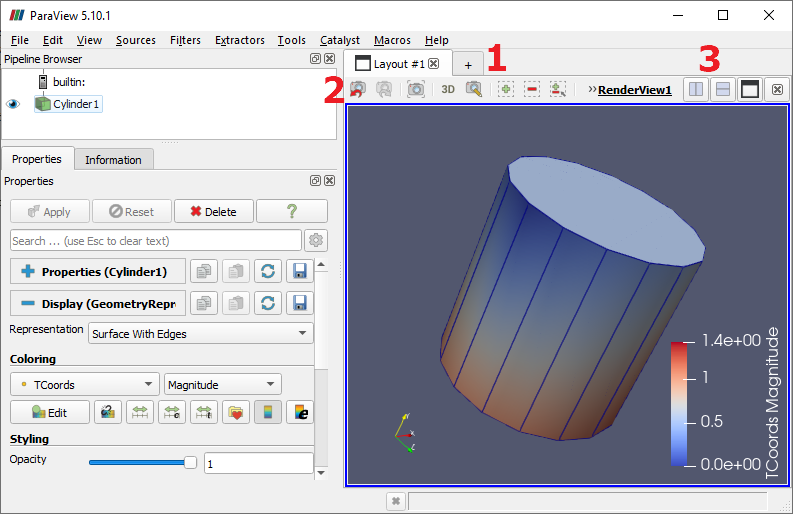
ParaView provides two methods for creating multiple views of the current visualization pipeline. The first method is to create multiple view "layouts" using the "+" tab (1). When you do this you must choose the type of the new view ("Render" is the type of view we have been using). The second method is to subdivide an existing layout into multiple frames using the split buttons in the layout toolbar (2). In this case the old and new views are part of the same layout tab and the new view is assigned the same type as the original view. Each view will display the same pipeline data, but can use different visibility and property settings for the pipeline nodes.
Note the two layout toolbar buttons for undo and redo (3). A stack of view changes is maintained separately for each view frame, and these buttons allow the user to back out of unwanted view changes. Undoing view changes is independent from undoing data-related actions.

Images seen in the render view can be saved as screenshots using
CVW material development is supported by NSF OAC awards 1854828, 2321040, 2323116 (UT Austin) and 2005506 (Indiana University)