Combining Filters
Continuing on from the previous section, let's see how filters can be combined to produce interesting results.
- Toggle the visibility of the source node off and select that node.
- Add a "Clip" filter using
Filters→Common→Clip . - Make the new "Clip1" node visible and click the "Apply" button.
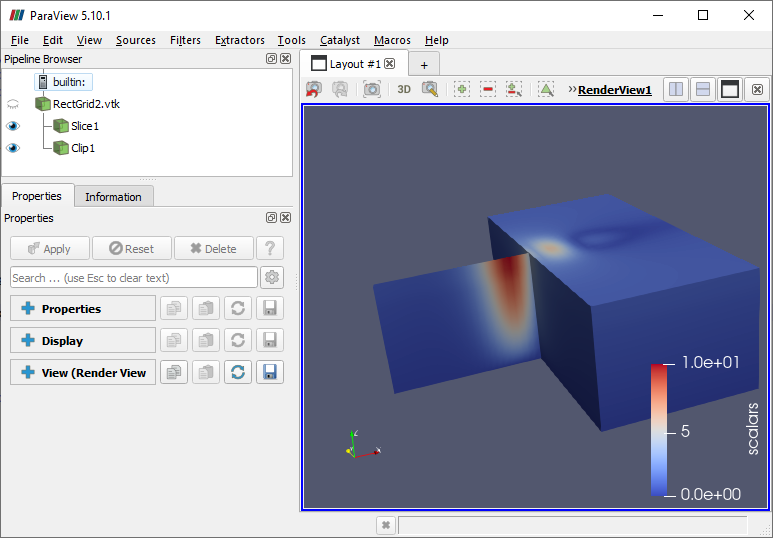
Notice how the data source node in the pipeline now has two child nodes, each of which contributes something independent to the rendered image. Clip filters eliminate from their output all data that lies on one side of a plane. When made visible, a Clip filter applied to a regular grid will display the data values on the exterior of the clipped data grid.
- Expand the Properties section to see that Clip has similar controls to Slice.
- Change the Normal plane parameter property to be [-1, 0, 0] to "flip" the direction of the clipping plane.
- Collapse the Properties section.
- Select the top node in the Pipeline Browser to hide the bounding boxes.

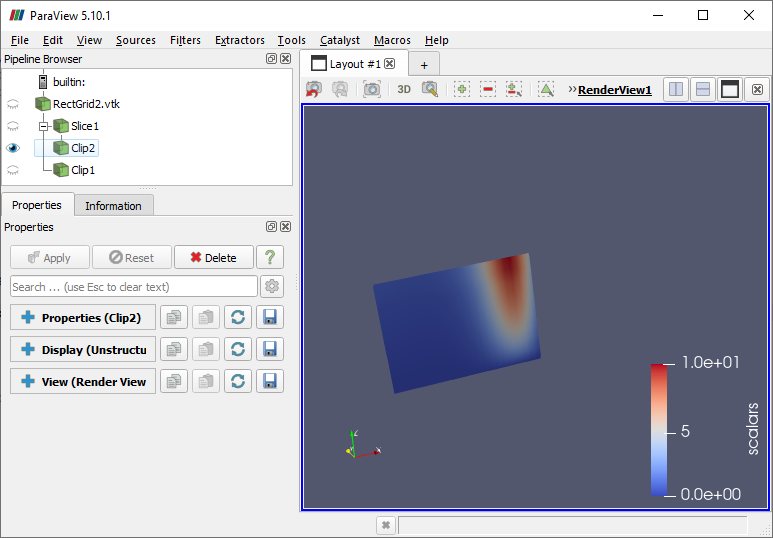
A Clip filter can also be applied to the Slice filter's results. This will cause only a subset of the Slice "image" to be shown.
- Toggle off the visibility of the Clip1 node.
-
Select the Slice1 node and use
Filters→Common→Clip to add a child Clip node to it, then click Apply. - Toggle off the visibility of Slice1 and toggle on the visibility of Clip2.
We see the expected results, with the Slice image being clipped in half. What would happen if the Clip filter was used first and the same Slice filter applied to it? In this case, the results would be the same.

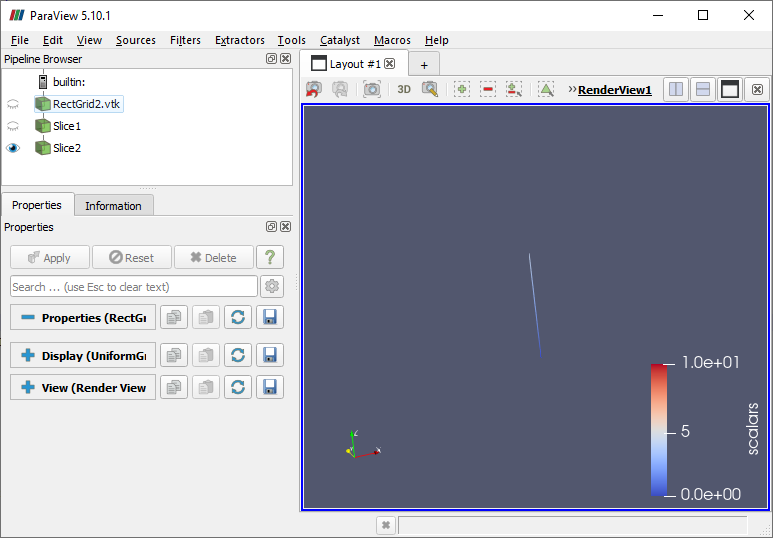
As a final exercise, we can combine two Slice filters to produce a thin strip of data.
- In turn, select each of the Clip nodes and click Delete in their Properties panel.
-
Select the Slice1 node and then use
Filters→Common→Slice to add another Slice filter as a child of the first. Click Apply. - Toggle the visibility off on the Slice1 node and on for the Slice2 node.
- Select the top node to hide the bounding boxes.
The resulting output is a line that samples values from the source grid.

CVW material development is supported by NSF OAC awards 1854828, 2321040, 2323116 (UT Austin) and 2005506 (Indiana University)